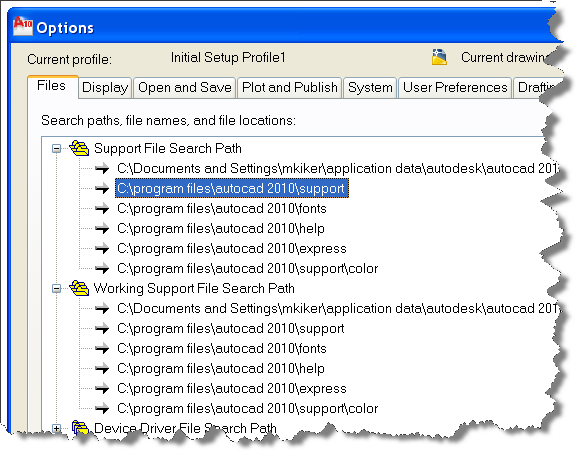
When you open the Options Dialog, the first Tab, moving from left to right, is the Files section.
Support File Search Path
First and foremost is where AutoCAD will look for support files that it needs to get the job done. You can get into trouble by adding too many or not adding enough to this list. Click on the little plus sign to see what is already in place.
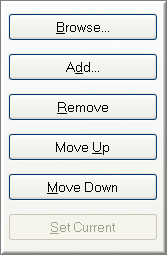
Out of the box, AutoCAD has the base folder paths that are needed to keep AutoCAD running. To add additional paths just hit the Add button on the right and Browsing until you find the desired directories.
Things to include may be the location of your Standard Blocks, Linestyle, Fonts, etc.
TIP: Remember that the order of the list matters (notice the Move Up and Move Down buttons). AutoCAD looks in the folders from top to bottom and stops looking once it has found a file by the name requested.
Working Support File Search Path
This section is read-only. This is what AutoCAD actually found from the lists above. If your server is down or someone has moved a folder or you have un-docked your laptop, then AutoCAD may not find some of the critical folders you have added above. When you reconnect and restart AutoCAD, the folders will be resolved.
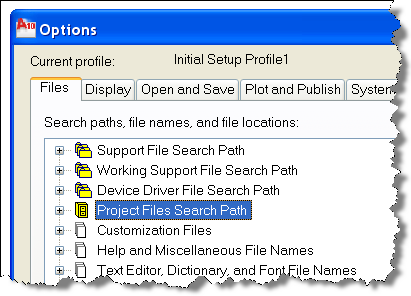
Device Driver File Search Path
Device drivers for your input device, printer, plotter and video display, etc. must be stored in this folder for AutoCAD to find and use them. Again if you have multiple folders it will use the first one it finds.
Warning: Even though it looks like you could remove it – do not remove any standard folders that are set. Do not remove the DRV folder that is there.
Project Files Search Path
The Support folders outlined above are used for every file that you open. If you want to have additional folder searches based on the project you are working on then you need to add them to this area.
This setting is for resolving XREF, Image files and DWF Underlays . Each project can searches different directories. It’s a simple process of Adding a named project and then adding the directories you want AutoCAD to use. Once you have added these optional paths you need to tell the DWG file to use them.
The PROJECTNAME system variable stores the project name. The project name corresponds to a search path for external reference (xref) files associated with the project. You can create any number of project names with associated folders, but each drawing can have only one PROJECTNAME variable set.
This can be done when an xref or image is not found in its original path. The project name points to a section in the registry that can contain one or more search paths for each project name defined.
Project names make it easier for users to manage xrefs and images when drawings are exchanged between customers, or if users have different drive mappings to the same location on a server. Even better than this is to use Relative Paths for Xrefs.
If the XREF or image is not found at the original path, the project paths associated with the project name are searched. If the xref or image is not found there, the AutoCAD search path is searched.
TIP: don’t forget that the PROJECTNAME variable is stored in each drawing file. If another machine does not have the Project Search set, they will not see the XREFs. If a file does not have the variable set it never looks in this area.
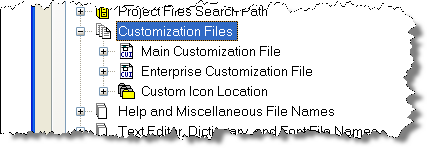
Customization Files under the Files Tab allows you to do the following:
Main Customization File
Specifies the default location of the main customization file (acad.cuix).
The CUIx file is a file that contains multiple XML-based files and custom image files. You modify a customization file through the Customize User Interface (CUI) Editor. CUIx files replace the CUI, MNU, MNS, and MNC files that were used to define menus in releases prior to AutoCAD 2010. ( I miss the MNU files)
Enterprise Customization File
Specifies the location of an enterprise customization file.
The Enterprize CUIx file is typically controlled by a CAD Manager. It is accessed by all users and is stored in a shared network location. The file is set to read-only to prevent the data in the file from being changed by someone that does not know how to manage it. A CAD Manager creates an enterprise CUIx file by modifying a main CUIx file and then saving the file to a shared network drive. Users can then set this name so that they see it.
Custom Icon Location
Specifies the location for custom icons used in customization files. This must be in the search path correctly or you could end up with smiley faces for icons.
Continuing the march through the Options Dialog box…
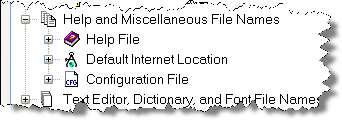
Help and Miscellaneous File Names
Help File
Specifies the location of the Help file. – don’t change this
Default Internet Location
Specifies the default Internet location used by both the BROWSER command and the Browse the Web button on the Web toolbar.
Type in Browser and hit enter to get a quick access dialog.
I changed mine to http://www.augi.com so I could get the AUGI quick
Note: INETLOCATION – Stores the Internet location used by the BROWSER command and the Browse the Web dialog box.
Configuration File
Specifies the location of the configuration file used to store hardware device driver information. This value is read-only and can be changed only by using the /c command line switch. Don’t change it.
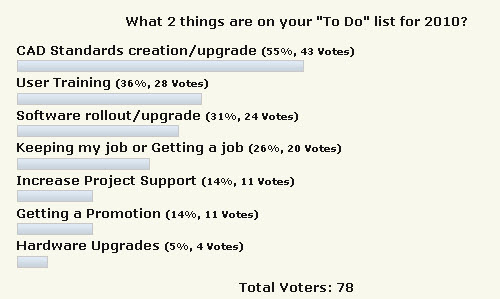
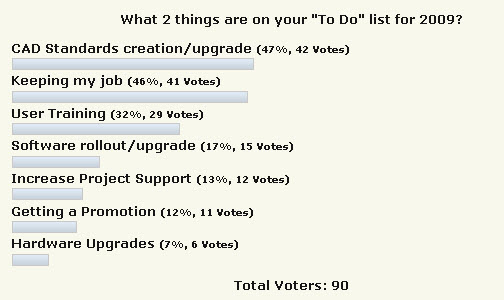
I asked what was on your list of focuses in 2010, then I compared the results to the 2009 survey on the same topic. Here is what I found…
The concept was to allow only two choices from the list as the ones that they would focus on in 2010.
The top issue remains CAD Standards and it has actually gathered more focus that last year. 55% saying it was a top focus in 2010 compared to 47% in 2009.
Software rollout swapped places with User training in 2010. Training is needed in the minds of CAD Managers a little more than rolling out new software.
Job stability as a main focus moved down on the list of concerns in 2010. This is good news as this area was the second highest concern in 2009. It dropped from 46% of those who took the survey in 2009 saying it was on their list down to 26% in 2010. That means that almost 75% did not consider the need to focus on keeping their job as a priority, compared to almost half in 2009.
Here are the results from 2010.
And from 2009
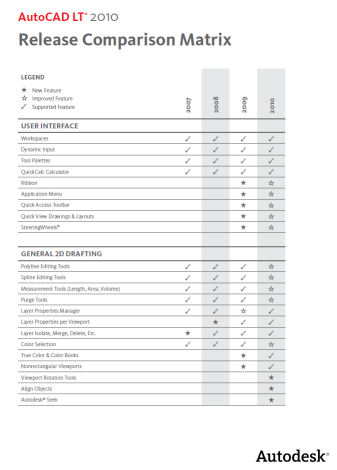
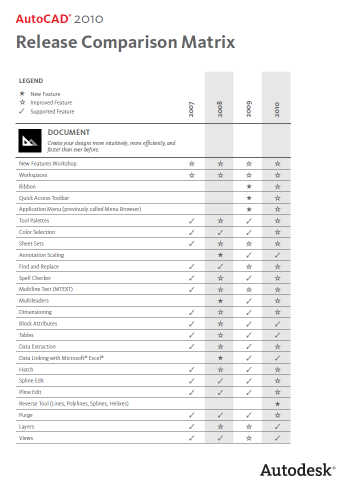
Here is the AutoCAD LT 2010 Release Comparison Matrix from the Autodesk website – what features were added into what release.
You can get the list here
Here is a list of the commands that are in AutoCAD 2007 thru 2010 and when they were introduced.
You can see the list here
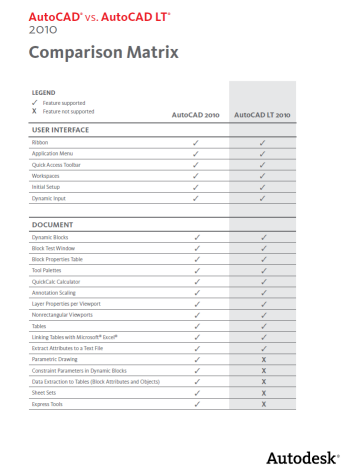
Here is the 2010 Comparison Matrix between AutoCAD and LT that I found on the Autodesk website
You can see the list here
Double click on a PDF Underlay and you get the Ribbon to display the PDF Underlay functions.
You can set Contrast and Fade with slider.
Choose to set display to monochrome.
Create and remove clipping boundaries.
Show or not show the Underlay with a toggle
Enable Snapping
Adjust XREF info
and Edit the Layer displayed.
Note: If you turn off the display of an Underlay you need to zoom all the way out and select the Underlay Frame and then turn the display back on.
FRAME
Turns the display of frames on and off for all external references, images, and DWF, DWFx, PDF, and DGN underlays.
PDFFRAME
Determines whether the PDF underlay frame is visible.
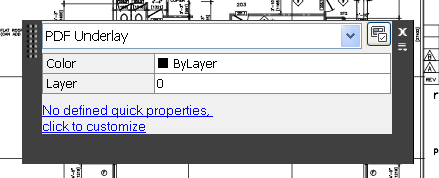
You can adjust properties of a PDF Underlay after it has been attached.
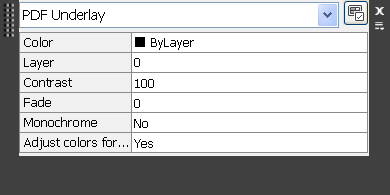
1. Left click on the PDF graphic anywhere and you will see the dialog box below. Is shows you that you have selected the PDF Underlay and allows you to change a few properties.
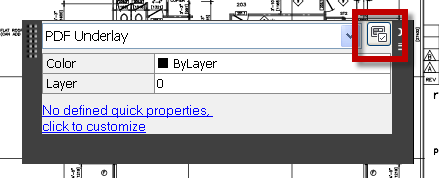
2. You can change the dialog box options by clicking onthe icon in the upper right corner
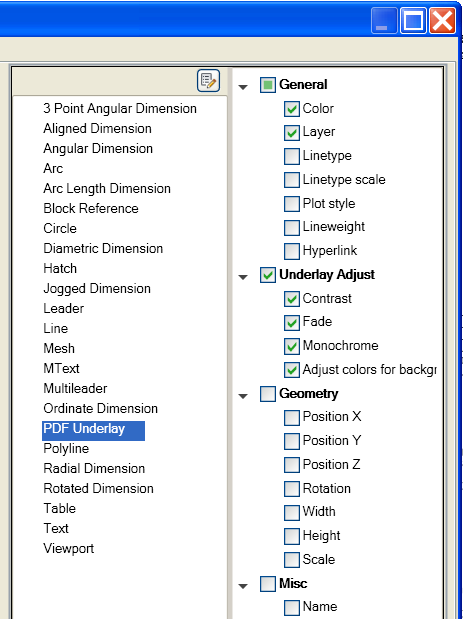
3. You will get another dialog box that allows you to select what is displayed in the fist dialog. Add some – like I do here for Underlay Adjust.
4. Once you save the options they will show up the next time.
